Quick Start Guide for Client Sub
Quick Start Guide for Client Sub
Kalay Cloud VMS
1. Before You Start
Section titled “1. Before You Start”-
Sub Account Activated --- created by the Main account or Dealer, email activation completed.
-
Camera Access Granted --- specific cameras have been assigned to your account by the Main account.
2. Getting Started --- Your First 5 Minutes
Section titled “2. Getting Started --- Your First 5 Minutes”Follow these steps to log in, review your dashboard, and confirm your assigned devices are visible.
Step 1: Log In (1 min)
Section titled “Step 1: Log In (1 min)”-
Check your email for “Please Activate Your Account” from the Main account or Dealer.
-
Follow the activation link and set your password.
-
Log in at your Kalay Cloud VMS URL.
-
Accept the cookie banner if it appears.
-
Wait for the Dashboard to load.
What success looks like: You land on the Dashboard with device status, events today, alerts today, and event statistics visible.
Step 2: Review Your Dashboard (2 min)
Section titled “Step 2: Review Your Dashboard (2 min)”| Dashboard Area | What It Tells You |
|---|---|
| Device Status | Online vs. offline count for your assigned devices |
| Events Today / Alerts Today | Total triggered events and alerts for the current day on your assigned devices |
| Event Statistics | Top 5 most active channels and hourly event heat map |
| People Counting | Requires compatible device --- click “People Counting” tab if available |
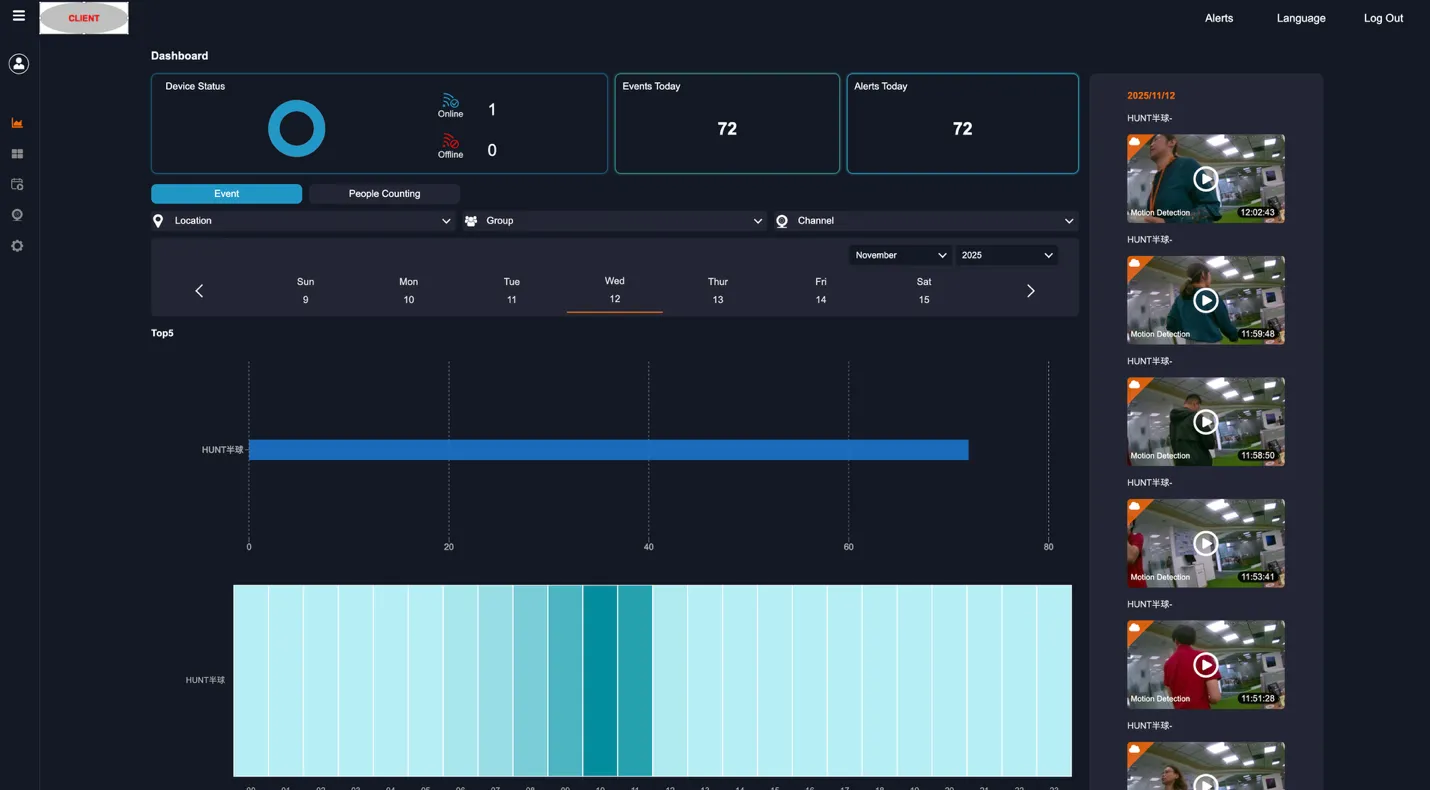
Figure: Client Sub Dashboard --- device status, events, alerts, Top 5 channels, and recent event feed
Step 3: Verify Your Assigned Devices (2 min)
Section titled “Step 3: Verify Your Assigned Devices (2 min)”-
Navigate to Device in the left navigation.
-
Confirm your assigned devices appear in the device list.
-
Check that the expected location, device name, and channel are visible.
-
Verify the device status shows online (blue icon).
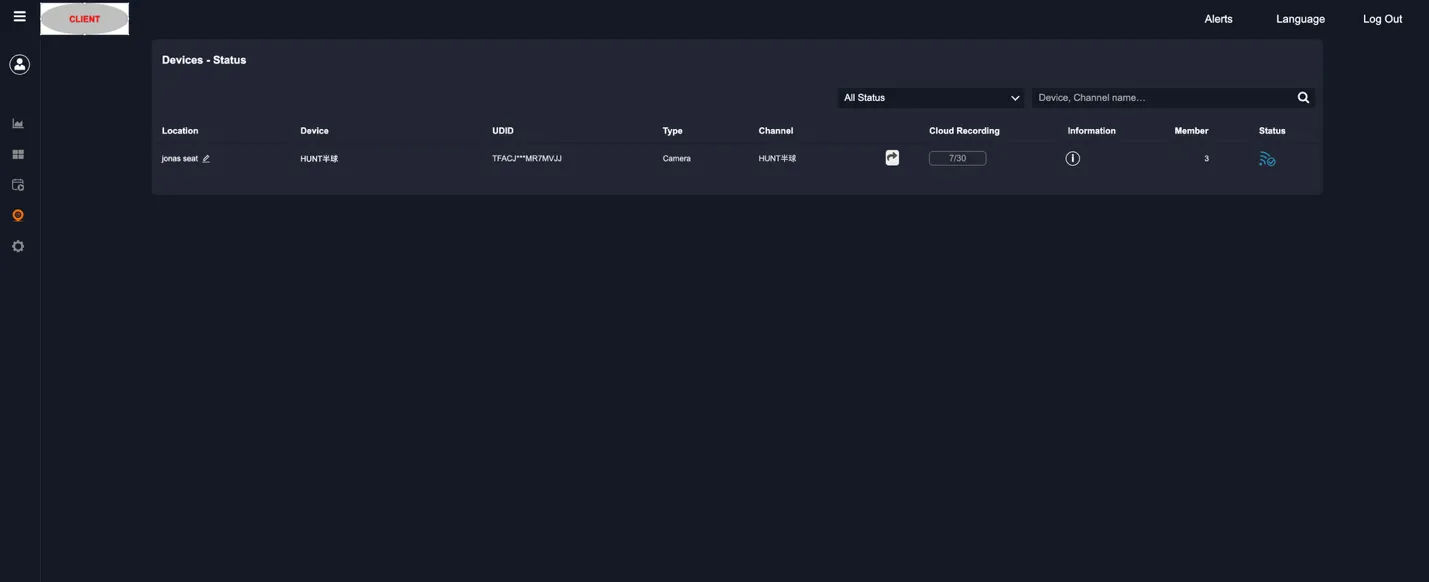
Figure: Device List (read-only) --- you only see devices assigned to you by the Main account
- Open Live View --- confirm at least one camera feed is streaming.
Done! Your environment is ready for daily monitoring.
3. Ongoing Operations
Section titled “3. Ongoing Operations”Your day-to-day work is monitoring live feeds, reviewing events, and managing your personal alert preferences.
Live View
Section titled “Live View”- Access from the left navigation.
- Choose layout options: 1, 4, 9, or 16 cameras per screen (only assigned cameras are visible).
- Filter by Location, Group, or Channel using the top selectors.
- Click any camera for single-channel full view.

Figure: Live View --- assigned camera feed with Location, Group, and Channel filters
Event Management
Section titled “Event Management”- View, filter, play, share, and download event clips from your assigned devices.
- Filter by Location, Group, Channel, date range, and event type.
- Click an event thumbnail to play back the recording.
- Use the download icon to save clips locally, or the share icon to generate a link.
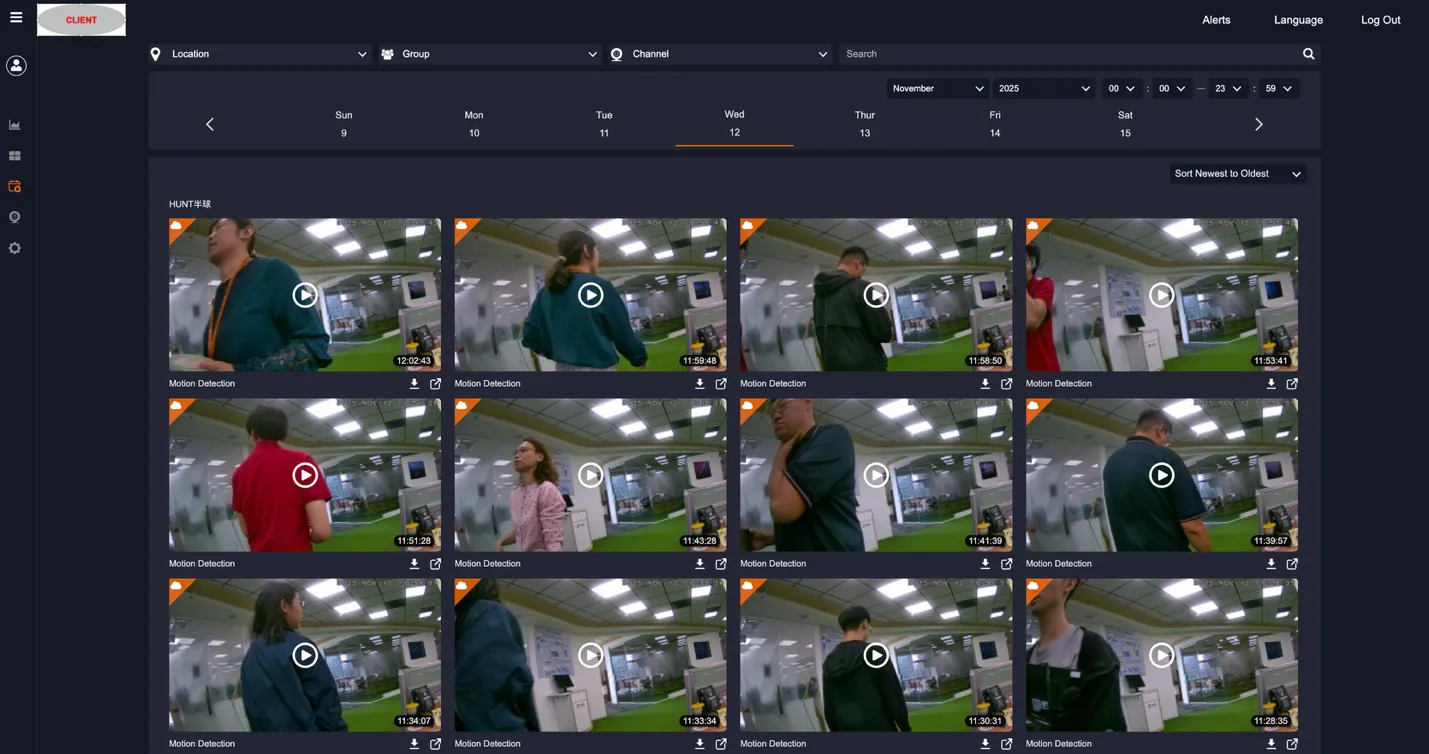
Figure: Event Management --- event thumbnails with playback, download, and share actions
Alerts and Notifications
Section titled “Alerts and Notifications”Set up personal alerts to receive notifications when events occur on your assigned devices:
-
Navigate to Device -> Alerts.
-
Select the event types to monitor.
-
Configure notification methods:
- Email: alerts sent to your registered email address.
- LINE: alerts sent via LINE (requires account binding).
- Browser: push notifications (requires browser permission).
- Use Quick Group Setup to apply alert rules across multiple channels at once.
Sharing Live View
Section titled “Sharing Live View”You can generate shareable links from your assigned channels:
- Recipients do not need a VMS account.
- Links provide live camera feed only --- no access to recordings or settings.
- Links are time-limited and usage-limited.
- Links can be disabled anytime.
Account Management
Section titled “Account Management”Manage your personal account settings:
- View and edit your account information (Name, Mobile, LINE ID).
- Change your password.
- Delete your account --- this removes all your access permanently. Use with caution.
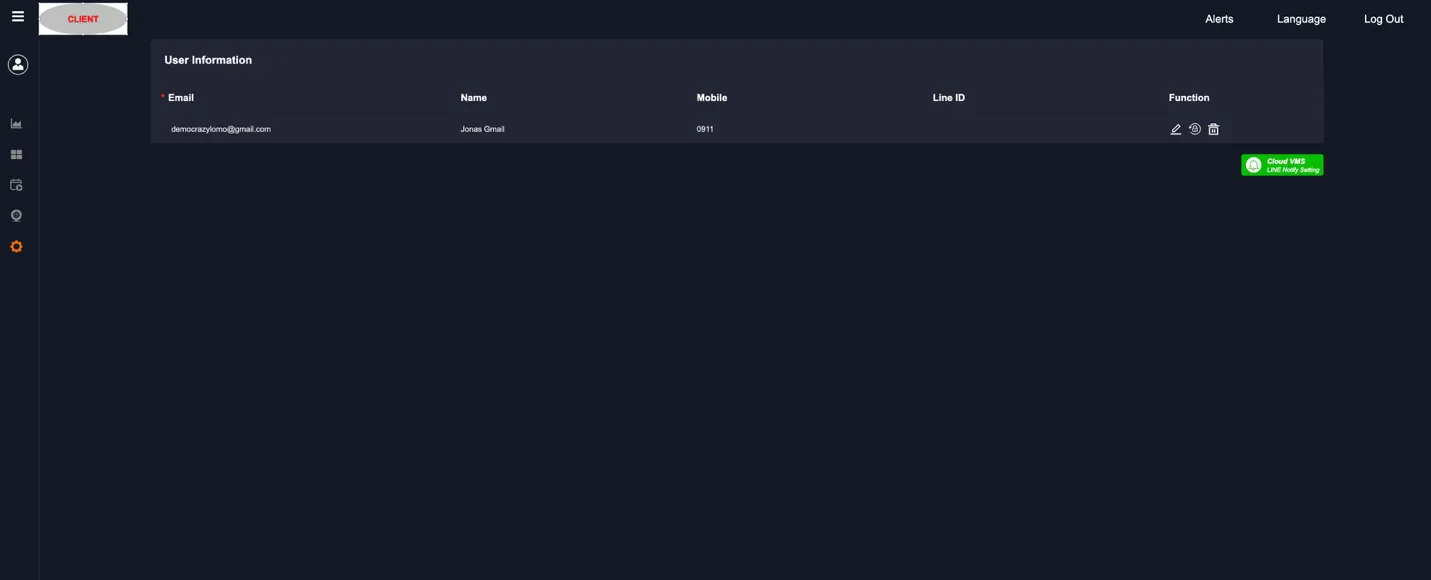
Figure: Account Management --- user information with edit, password change, and delete functions
4. Troubleshooting
Section titled “4. Troubleshooting”Cannot See Expected Cameras
Section titled “Cannot See Expected Cameras”-
Check if the devices are offline (blue icon = online in device list).
-
Contact your Main account administrator.
-
Verify which devices should be assigned to you.
-
Check if you are in the correct group.
-
Ask the Main account to verify your permissions.
Live View Not Working
Section titled “Live View Not Working”-
Verify device is online (blue status icon in device list).
-
Check your internet connection.
-
Refresh the browser page.
-
Clear browser cache and cookies.
-
Try Chrome or Edge if using a different browser.
-
Report to Main account if the problem persists.
Not Receiving Alerts
Section titled “Not Receiving Alerts”-
Verify alert types are enabled (check with Main account if unsure).
-
For email: check spam/junk folder.
-
For LINE: confirm account is bound.
-
For browser: allow notifications in browser settings.
-
Contact Main account to verify alert configuration.
Events Not Appearing
Section titled “Events Not Appearing”-
Check date/time filters --- try clearing all filters first.
-
Verify you have access to those cameras.
-
Confirm events occurred on your assigned devices.
-
Check with Main account about device permissions.
Cannot Download Event
Section titled “Cannot Download Event”-
Verify you are logged in.
-
Check your internet connection.
-
Ensure your browser allows downloads.
-
Try a different browser.
-
Check if the event still exists (recordings may expire based on the cloud plan).
Next Steps
Section titled “Next Steps”- Set up alerts early so you get notified of critical events from day one.
- Bookmark the Live View page for quick daily access to your assigned cameras.
- Contact your Main account if your access scope changes or if you need visibility to additional devices.
- Refer to full Kalay Cloud VMS documentation for advanced features and detailed troubleshooting.
Version History
Section titled “Version History”| Date | Description | Author |
|---|---|---|
| 2025/11/12 | Quick Start Guide for Client Sub v1.0 | Jonas Chen |
| 2025/11/14 | Add prerequisites | Jonas Chen |
| 2026/03/20 | Align to standard QIG structure | Louis |