Quick Start Guide for Client Main
Quick Start Guide for Client Main
Kalay Cloud VMS
1. Before You Start
Section titled “1. Before You Start”-
Main Account Activated --- created by your Dealer, email activation completed.
-
Devices Ready for Binding --- cameras/devices are powered on, connected to the network, and in binding mode.
-
Cloud Plans Available (Optional) --- sufficient cloud recording plans have been allocated to your account by the Dealer.
2. Getting Started --- Your First 15 Minutes
Section titled “2. Getting Started --- Your First 15 Minutes”Follow these steps to log in, review your dashboard, add devices, and set up cloud recording.
Step 1: Log In (1 min)
Section titled “Step 1: Log In (1 min)”-
Check your email for “Please Activate Your Account” from the Dealer.
-
Follow the activation link and set your password.
-
Log in at your Kalay Cloud VMS URL.
-
Accept the cookie banner if it appears.
-
Wait for the Dashboard to load.
What success looks like: You land on the Dashboard with device status, events, cloud plan usage, and VMS channel information visible.
Step 2: Review Your Dashboard (2 min)
Section titled “Step 2: Review Your Dashboard (2 min)”| Dashboard Area | What It Tells You |
|---|---|
| Device Status | Online vs. offline device count |
| Events Today / Alerts Today | Total triggered events and alerts for the current day |
| Cloud Recording Plan (Event) | Active vs. total plans per tier --- check remaining capacity |
| VMS Channel | Active vs. total licensed channels |
| Event Statistics | Heat map (hourly event frequency) and Top 5 most active channels |
| People Counting | Requires compatible device --- click “People Counting” tab to view insights |
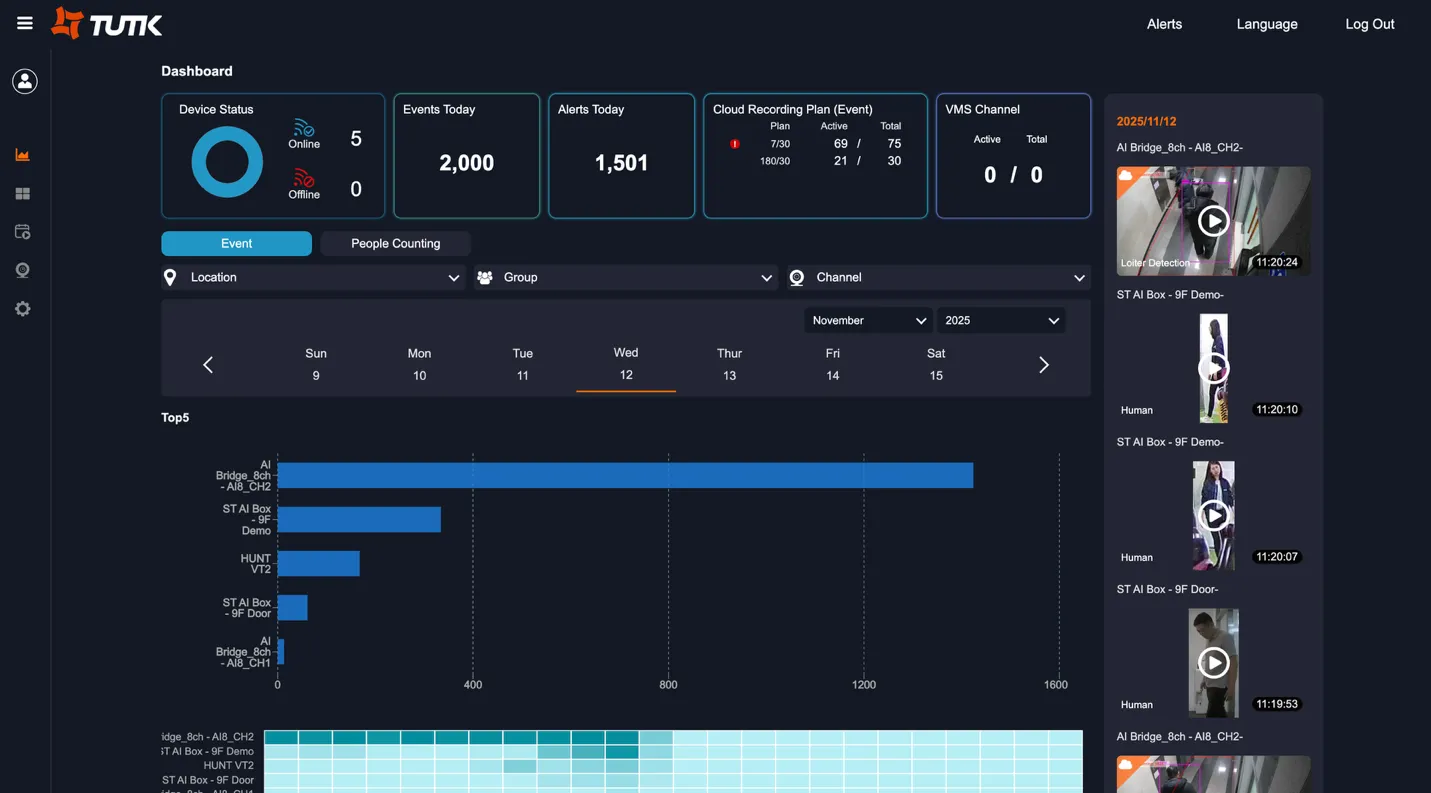
Figure: Dashboard --- device status, events, cloud plans, VMS channels, event statistics, and recent event feed
Step 3: Add Devices (5 min)
Section titled “Step 3: Add Devices (5 min)”Method 1: QR Code Scanning (Recommended)
Section titled “Method 1: QR Code Scanning (Recommended)”-
Navigate to Device -> Add.
-
Select the “Scan” tab.
-
Allow camera access when prompted.
-
Point your computer/tablet camera at the device QR code (on the device label or in device settings -> TUTK tab -> Bind QR code).
-
Device information loads automatically.
-
Click OK to add.
Method 2: QR Code for WiFi Cameras
Section titled “Method 2: QR Code for WiFi Cameras”-
Click Add -> “QR Code” tab.
-
Enter your WiFi SSID and password.
-
Click Generate QR Code.
-
The device scans the displayed QR code, connects to WiFi, and appears in the system.
-
Click OK to complete.
Method 3: Barcode Scanner
Section titled “Method 3: Barcode Scanner”-
Click Add -> “Barcode Scanner” tab.
-
Use a physical scanner to scan the device barcode or manually enter the code.
-
Click Add, then OK to confirm.
After adding, the device appears in your device list with location, name, channel list, and online status (blue = online).
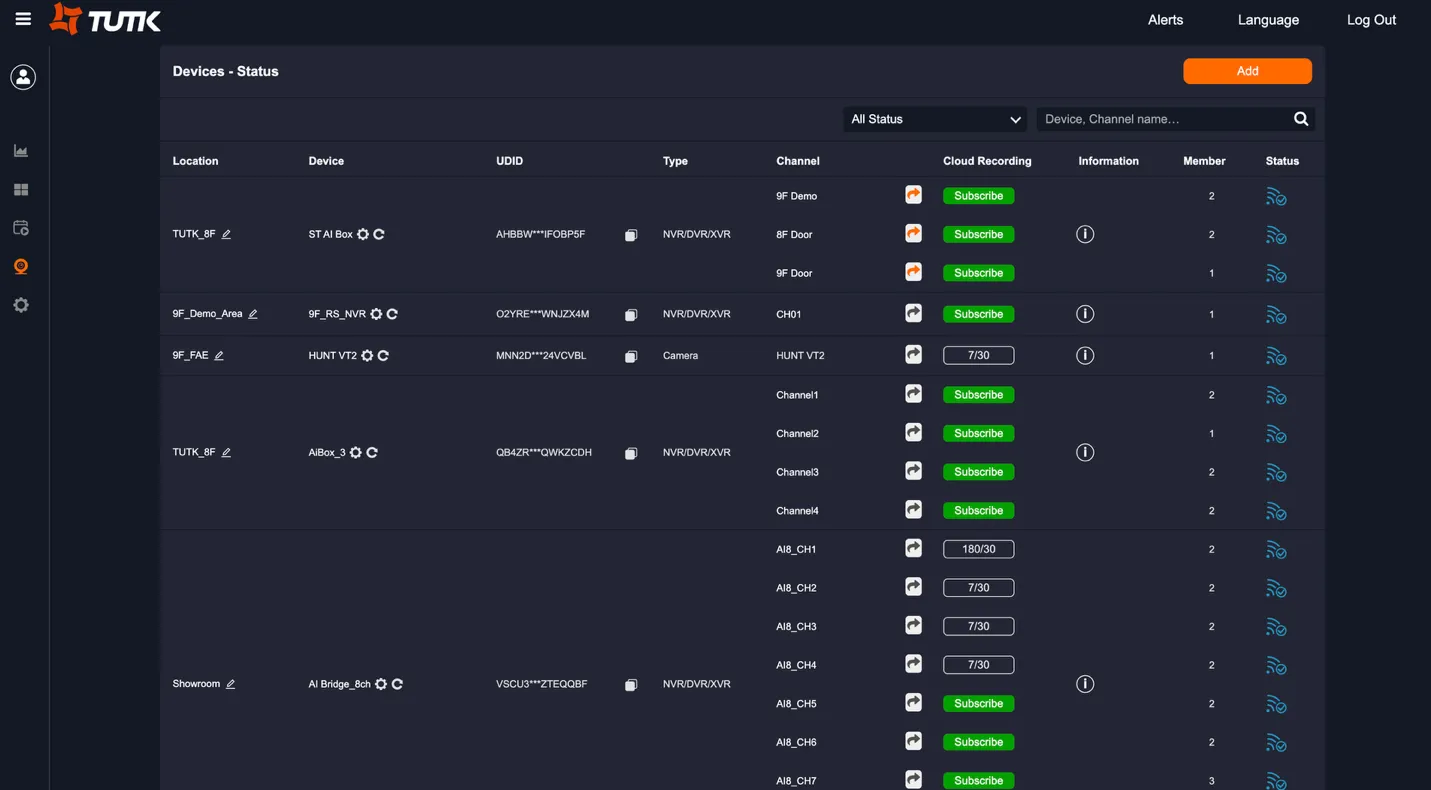
Figure: Device Status page --- location, device name, UDID, type, channels, cloud recording status, and Add button (top right)
Step 4: Subscribe to Cloud Recording (Optional, 2 min)
Section titled “Step 4: Subscribe to Cloud Recording (Optional, 2 min)”-
In the device list, find the channel you want to record.
-
Click the “Cloud Recording” button.
-
Click “Subscribe”.
-
Select the plan type.
-
Click “Submit” to activate.
Step 5: Verify Setup (2 min)
Section titled “Step 5: Verify Setup (2 min)”- Return to Dashboard --- confirm device count and online status.
- Open Live View --- confirm at least one camera feed is streaming.
- Check Cloud Recording Plan on the Dashboard --- confirm active count matches your subscriptions.
Done! Your environment is operational. You can now monitor live feeds, review events, and manage your team’s access.
3. Ongoing Operations
Section titled “3. Ongoing Operations”After initial setup, your day-to-day work includes live monitoring, event review, alert management, and sub-account administration.
Live View
Section titled “Live View”- Access from the left navigation.
- Choose layout options: 1, 4, 9, or 16 cameras per screen.
- Filter by Location, Group, or Channel using the top selectors.
- Click any camera for single-channel full view.
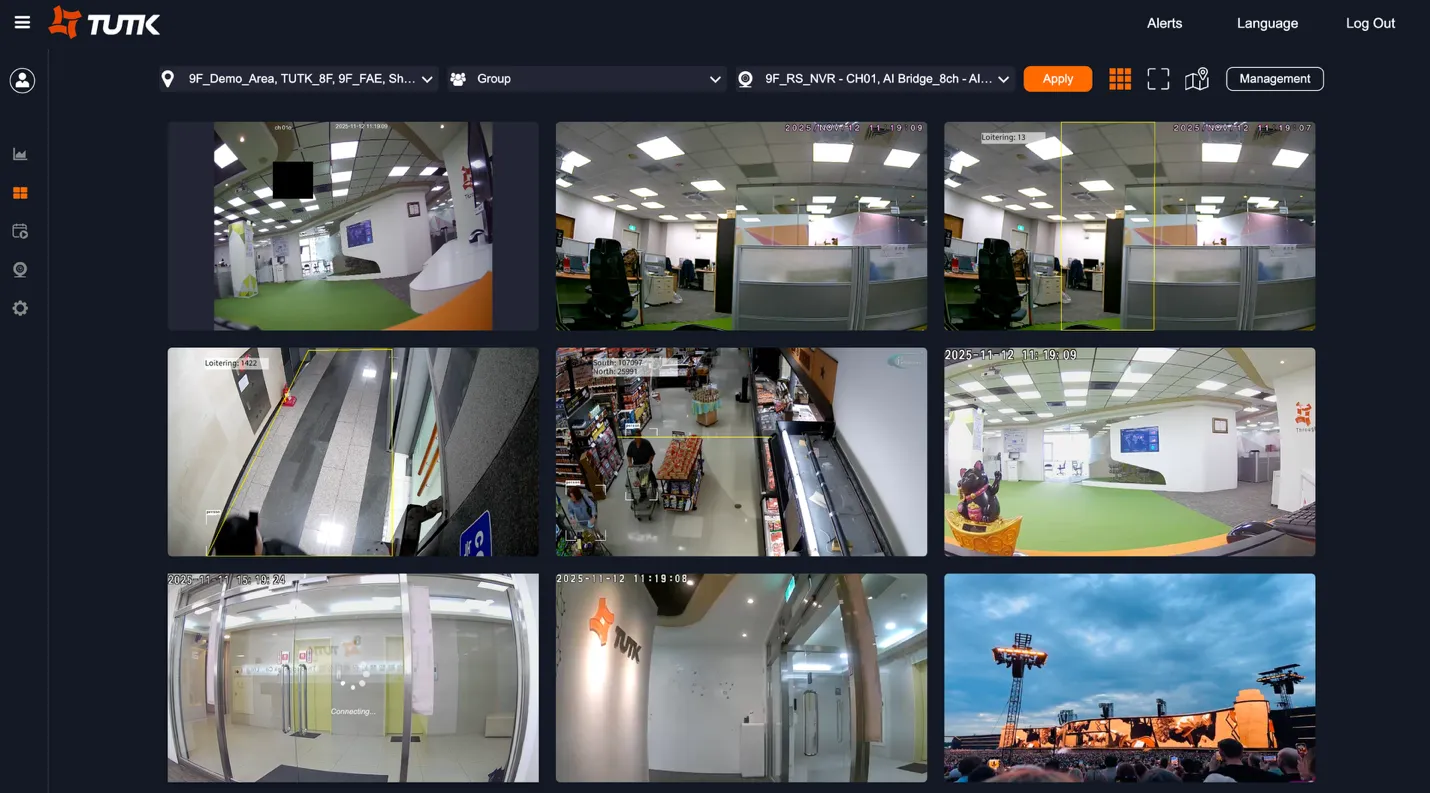
Figure: Live View --- multi-camera grid with Location, Group, and Channel filters
Event Management
Section titled “Event Management”- View, filter, play, share, and download recorded event clips.
- Filter by Location, Group, Channel, date range, and event type.
- Click an event thumbnail to play back the recording.
- Use the download icon to save clips locally, or the share icon to generate a shareable link.
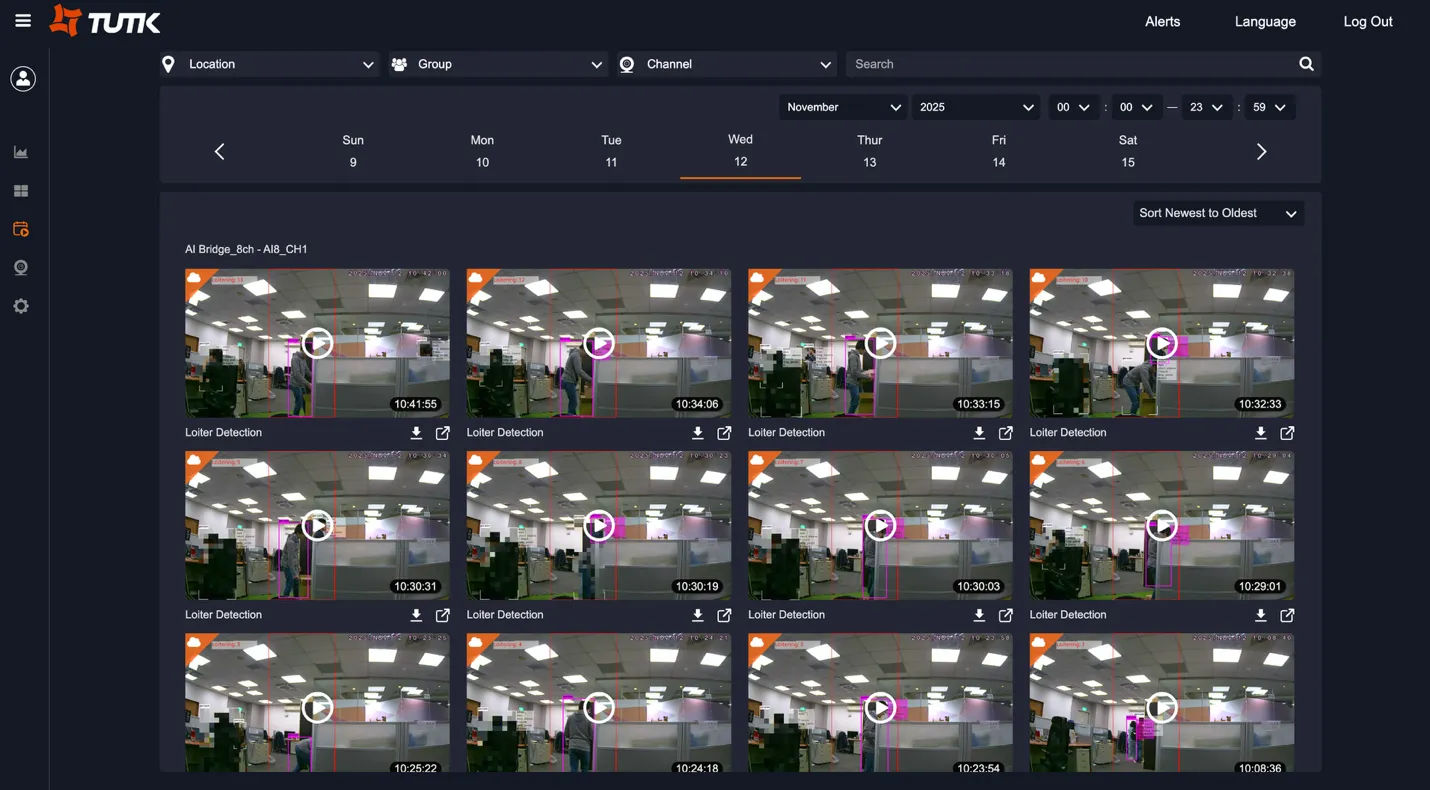
Figure: Event Management --- event thumbnails with playback, download, and share actions
Alerts and Notifications
Section titled “Alerts and Notifications”Set up alerts to receive real-time notifications when events are detected:
-
Navigate to Device -> Alerts.
-
Select the event types to monitor.
-
Configure notification methods:
- Email: alerts sent to your registered email address.
- LINE: alerts sent via LINE (requires account binding).
- Browser: push notifications (requires browser permission).
- Use Quick Group Setup to apply alert rules across multiple channels at once.
Sub-Account Management
Section titled “Sub-Account Management”Create delegated user accounts for your team members with scoped access:
-
Navigate to Account.
-
In the Sub-Account section, click to add a new sub-account.
-
Enter Email and basic profile fields (Name, Mobile, LINE ID).
-
Assign device/channel scope through Permission Management.
-
The sub-account receives an activation email.
You can also promote a sub-account to main-account level, or remove sub-accounts as needed.
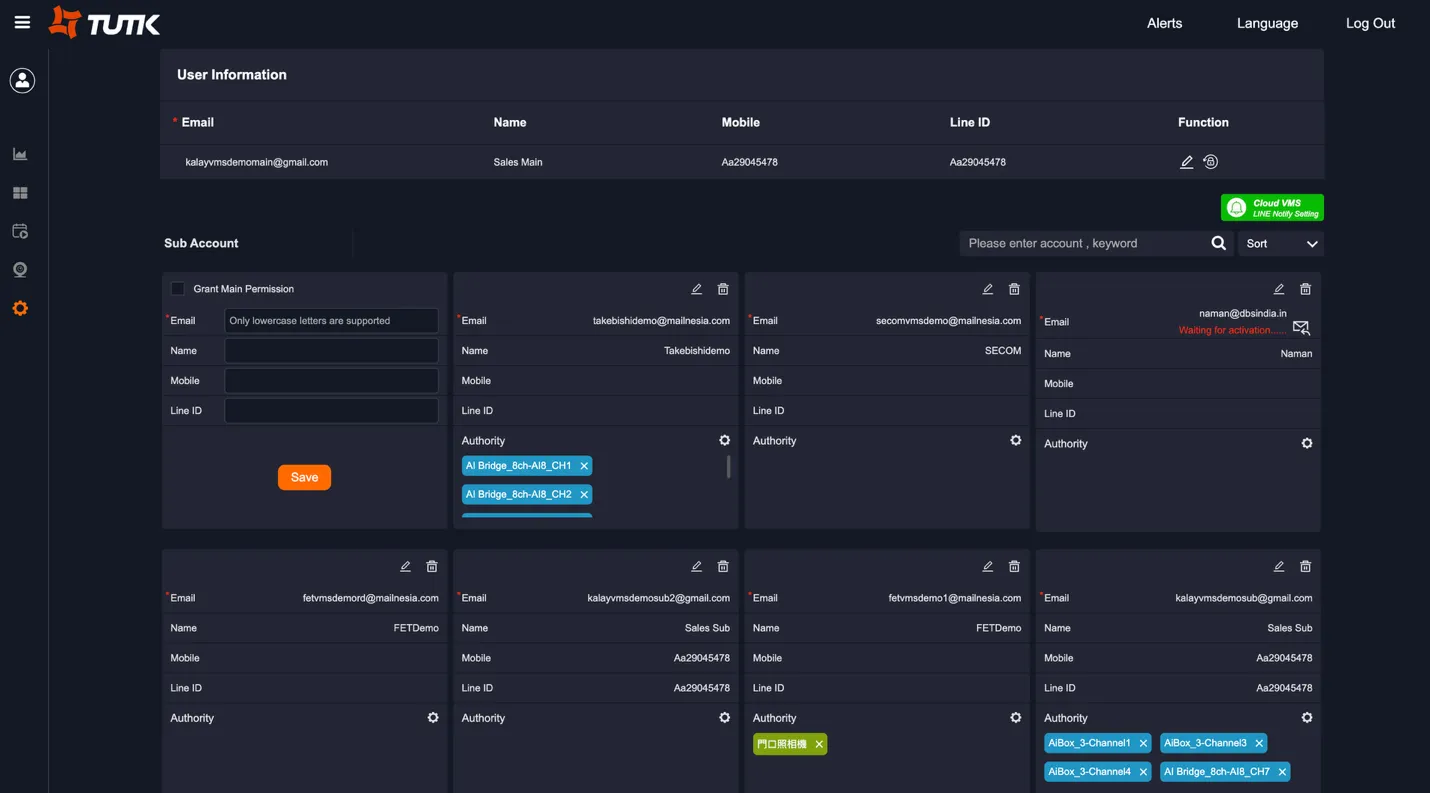
Figure: Account Management --- main account profile (top), sub-account list with permission assignment per user (bottom)
Additional Features
Section titled “Additional Features”| Feature | How to Use |
|---|---|
| Share Live View | Generate a shareable link from any channel. Recipients do not need a VMS account and can view live camera feed only --- no access to recordings or settings. Links are time-limited, usage-limited, and can be disabled anytime. |
| Floor Plans / Mapping | Create floor plans or maps, position devices on them for spatial awareness. |
| Recording Schedule | Set per-channel recording schedules using the calendar interface under Device -> Schedule. |
| Device Configuration | Typically configured by the assigned Technician. Covers location, device name, channel selection, channel configuration, remote link, storage management, firmware update, live view settings, event settings, and local recording settings. |
| Site & Group Management | Create groups, assign sub-accounts and channels to groups, and manage group membership for organized monitoring. |
4. Troubleshooting
Section titled “4. Troubleshooting”Cannot See Live View
Section titled “Cannot See Live View”-
Verify device is online (blue icon in device list).
-
Check your internet connection.
-
Try a different streaming method (in device settings).
-
Refresh the browser.
-
Clear browser cache.
Events Not Recording
Section titled “Events Not Recording”-
Check motion detection is enabled (Device -> Event Recording or Device -> Channel -> Event Recording).
-
Verify local or cloud recording is active.
-
Review the recording schedule settings.
-
Confirm the device supports event recording.
Alerts Not Received
Section titled “Alerts Not Received”-
Verify alert type is checked in Alerts settings.
-
For email: check spam/junk folder.
-
For LINE: confirm account binding.
-
For browser: allow notifications in browser settings.
-
Test alerts by triggering motion in front of the camera.
Device Shows Offline
Section titled “Device Shows Offline”-
Check physical power and network connections.
-
Verify router/network is working.
-
Restart the device.
-
Wait 2—3 minutes for reconnection.
-
Contact your Technician or Dealer if the problem persists.
Cannot Add Device
Section titled “Cannot Add Device”-
Confirm device is powered on and has internet connection.
-
Check if device is already added to another account.
-
Ensure correct UDID or QR code.
-
Contact your Dealer for assistance.
Next Steps
Section titled “Next Steps”- Share the Client Sub Quick Start Guide with team members who need scoped access to assigned cameras.
- Set up alerts early so your team gets notified of critical events from day one.
Version History
Section titled “Version History”| Date | Description | Author |
|---|---|---|
| 2025/11/12 | Quick Start Guide for Client Main v1.0 | Jonas Chen |
| 2025/11/14 | Add prerequisites | Jonas Chen |
| 2026/03/20 | Align to standard QIG structure | Louis |